Sunday, 30 January 2022

Developed Step by step outline

This post is the new run down for our opening sequence using the feedback we received from Mike and Matt and added them into the idea to make it flow nicer.

1. Cassette tape player throughout the scene (Maybe Jazz music whether we can get hold of free jazz music) – the camera has an ECU, of the play button being pressed by an anonymous hand. 
2. tape continues – Fades from black to show a CU a bucket full of water with droplets slowly falling into it. With a bloody wet towel falling over the side. 

3. A depth of field shot showing some rusted and bloody torture tools on the wall. 

4. Shot of hand with blood dripping down with bruised knuckles with tied up hands (with the non-diegetic sound of the punches being thrown).

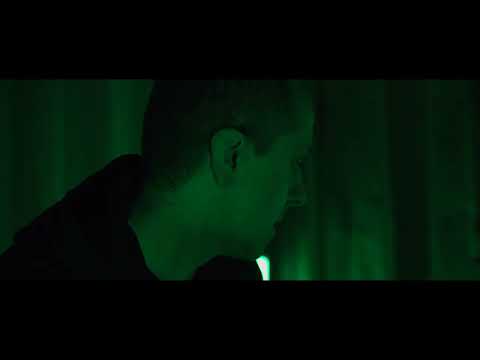
5. Dolly shot from behind the villain mentally beating up the victim in the chair pulling away to reveal the container in its full and seeing blood splatters appear from the left and right.

6. One powerful brut punch sends the chair on its side with a loud thump and scream. (Preferably a CU) shot of the face of the victim hitting the floor in slow motion with the non-diegetic sound of ringing in the ears. 

7. The villain walks over to a table, where he drops a bloody pair of knuckle dusters on a table, where he goes to pick up a white handkerchief to wipe down his hands from a low angle shot. 

8. The villain proceeds to look up into a completely cracked mirror (around the mirror there are lots of pictures of different people with pins all leading towards the to the mirror where he sees his reflection and slowly starts to reveal a subtle but demonic smile (for example using the victim’s blood to create an over exaggerated smile, accompanied with a laugh. 

9. We see that one of the victim’s hands has. Slipped free from his restraint he desperately tries to undo his other hand while the villain doesn’t notice. The camera will have the hands in the bottom right of the screen in the foreground and the top left but blurry you can see the villain looking into the mirror.

10. The villain grabs a mouldy glass on the side of his table and proceeds to pour straight vodka into the glass.

11. He then proceeds to pick it up and shot it back while squinting into the mirror, with a sort of disgust face.

12. Using an ECU, you can see a droplet fall down his face, and once it falls off his chin the camera will cut to show another drop of water falling into the bucket.

13. The victim grabs the villain’s foot to pull him down to the floor.

14. The villain Smashes his head on the floor of the container with the hood falling and revealing his face to the audience.

15. There is a moment where the victim and the villain make eye contact and the victim looks so shocked as if he knows the villain.

16. Through the top of the villains head we see blood start to fall from his head with a massive gouge, when it trickles down his face, he goes to touch it when it stings from them vodka that fell on his hands and sees the blood on his hands.


17. He sees this and looks up back at the victim and kicks him in the face sending him back down.

18. The victim tries to stand up but struggles from how weak he is but proceeds to get onto his feet.

19. The Villain is already standing up again with his knuckle dusters at his aid, he swings at the victim.

20. The victim doges and uses the rope from before to take him out from his legs which results in a success for him.

21. He drops the rope and runs for the front of the container banging on it and screaming for help.

22. The camera cuts back to the bucket full of water where we see a hand reach into the shot and picks up the bloody towel and dunks it in the water.

23. The shot will be front on from the victim when we quickly see the villain whip the towel around his mouth and gag him with it and tries to also grab him from the neck to restrain him again.

24. The Victim pushes back against the wall of the container and the villain trips up and falls.

25. Both start groaning on the floor in agony holding parts of their body that are in true pain, the victim turns over and notices an oddly shaped black bag shoved beneath the table.

26. The victim squirms over and starts to unzip the bag. Until he notices a hoard of money stashed within, again while looking at this He has a shocked look on his face as if he knows why the money is there.

27. This is interrupted by the villain’s hand pulling the victim back over where from a low angle shot, with a bloody face with his fist up with a torture tool now in his hand the demonic blood smile he had is now all smudged.

28. He takes a strike at the victim, but he rolls out of the way by the time it reaches the floor.

29. The victim pushes himself off the floor again whilst holding his hip and uses the table as support.

30. He spots the Knuckle dusters that have been left on the side and decides to use it to his own advantage.
 
31. The Victim grabs the villain by the arm and turns him around to deliver one big striking blow to the face, which sends blood splattering at the mirror and knocks the villain out cold.

32. He turns to look at the mirror where he stares at himself for a moment like he can’t believe what he has just done.

33. The camera will go into a high angle shot where the camera will move upward to show the villain knocked out on the floor.

34. Th victim looks back towards the money and limps over to it.

35. He goes to pick it up while still groaning in pain, he zips it up and throws it over his shoulder.

36. The victim then goes over to the knocked-out villain and takes off his hoodie, to wear it for himself. 

37. The victim puts it on and takes one last look at the villain and smiles with a little chuckle to go with it. 

38. He turns back and walks to the front of the container and takes one big breath.

39. He slowly but with all his strength pushes the door open.

40. An over the shoulder shot from the villain when he is on the floor unconscious as the door opens and the light exposure takes over the shot to then reveal the title of the film.

Saturday, 29 January 2022

Our finished story board

Here is my finished storyboard which I have created to start showing how I picture my opening sequence to playout on camera when I go to start filming.


My finished part of the storyboard


 Here is my finished part of the storyboard which i have been working on for the group. 


Friday, 28 January 2022

Here is the making off my part of the storyboard

 This is me writing up my part of the storyboard and putting it together before i join it up with the rest of the group. I used my step by step to help me put it all together so it would all make sense to me and my group.


how to make a Storyboard


Storyboarding is very important before filming,

. because you are given an idea of what the outcome will look like.

. It's also an easy way to share your vision to people.

. it's a communication tool for the director to the crew (Dop, Camera operator etc.). 


This allows far easier group work. For the actors they can get an idea of the story and direction.

. Allows you time to plan before hand and not on set, this gives you more time to film. 

. Allows you to experiment. 

. Visually see the the plan and how it will progress through the sequence.


Storyboarding is also vital for after filming,

. For editing for seeing how it has transcripted to film.


Within your story board you need to include,

. Shot number (which goes last)

. Location 

. Action 

. Shot/movement 


. Sound

. Lighting

. Transition

. Timing


I should consider The Camera composition and framing: Remember things like rules of third, foreground background, symmetry and asymmetry (What/ how can you film in a visually interesting way)

and Editing: i need to think about the shot after, how might it work when edited together, either through juxtaposing or even how the shot types that might match.


Thursday, 27 January 2022

Review of the test shoot


 For our test shoot of our opening sequence i do think that some parts that we have imagined have actually translated quite well onto film, But i do think there is a lot more development into our opening sequence which will allow it to become a lot more engaging.


Our test shoot timing was 2 minutes ended up being around a minute, this issue was partly to do with the fact of the set we were in, and the time limit we had to film it in. 


The pace in my opinion has to be a lot slower and more demeaning to the audience it all just seemed to be quite quick which does not give the effect to make the audience feel unsettled and let that emotion sink into them, This made it quite boring to watch and had no incentive to make it engaging.


I would say that the narrative clearly isn't that straight forward from what i have looked at from the test shoot even from an edition and director's point of view, but today we were asked by Matt and Mike to see if there are any other ideas to make it look more interesting, like makybe the guy in the chair overpowers the villain. Another thought to change the costume just to see if we can not have it in a stereotypical way. 


I do think that there is a brief moment when tension was created within our test shoot, when the villain enters walking slowly but i think the pace of this should have been a bit slower to enhance the impending doom to the victim in the chair. I also think there was another moment with brief tension when the villain doesn't punch the victim but slowly pushes his head down to then fully punch him. 


Out of everything from the test shoot the part I am most proud off the shoot were some of the camera angle choices, For example when the victim notices the 'Security camera' in the corner which is really the camera. I also liked the shot behind the victim in the foreground then having the villain in the foreground playing into
the danger incroching to him.


As I said earlier there are some choices within the scene that need to be taken away and things that need to be added, for example the Purge mask that we were going to use acted like it was a knock off to the purge film, and the Full black suit acted like we were using a classic Tarantino aspect and not our own. So instead we need to think of a better costume design for the characters like maybe just a simple hoodie and jeans. Also the main incentive for t
he scene needs to change from an interrogation to be more intriguing to the audience. Maybe the victim isn't tied up but he's
already been hurt so much that he can't move, then the villin walks in and brings a tape recorder in and plays it to him,and it scares him but has the same reaction as the for example. 


The Idea of having the victim and the villain of the film as the same person is very cool to have and a very psychological thriller effect. The main part we need to figure out for the sequence is how to reveal to the audience that these 2 people are the same people. 

Test shoot (edited)

 Here is our test shoot for our opening sequence which i have edited together to give the group a rough idea about what the scene may look like, how long it is, would the idea be easy to pull off, rather than just imagining it.

Planning our test shoot


 The purpose of doing a test shoot before doing our real take on our opening sequence if for multiple aspects, To see how your idea will start to look on camera, How long the idea is and whether you have to make it shorter or longer, and to look at different technical aspects you are using like camera angles.

Idea: shipping container 

Location: Hurtwood basement hallway 


Characters: 2 males Preferably male (for this test shoot Elias and Raf Jackson) 

Camera: Raffie’s Phone 

Props: . Knuckle dusters - we can’t use for test shoot so instead we just used the hand


. Rope – instead of rope for the test shoot we will use a jumper to a chair 

. Chair 


. Purge mask 


. Security camera - We decided to film a shot as the security camera as we couldn't find the right substitute prop.

. torture tools – wooden cutlery

. blood – icing mixed with water (or ketchup) 


. Suit - As we had no suit we used a hoodie to cover up the face as much as possible.


we had to find ways around the difficult shoot. As we are using a shipping container for our main shoot of the opening of the film. For the test shoot we are going to use a dark hallway with a chair in the middle. For actors we asked one of our friends to act in it as on of our group members had COVID.

our Roles for shoot Raffie: Editor, BTS 

Sophie: camera operator and BTS 

Elias: actor BTS 

Alice: ill

Raf Jackson: Actor


The test shoot I think went well but we struggled massively with the time limit we had as we didnt have enough time to finish the shoot which resulted in the test shoot being shorter than we would have liked it to be.


I think to do this better we should have organised it before a bit more to see what else for props we could have used just to make it look a bit better and more visually accurate, and planned out how long to shoot for in advance but this didn't help as we had a shorter lesson than normal anyway. 

Tuesday, 25 January 2022

Independent research 2 (fight sequence)

 during our opening of our film it will consist of quite a violent part when it will involve the villain beating up the victim in the chair. To accomplish this and to make it look believable as possible i have decided to go and research how make a fight scene look real on film.


One massive important part of making a scene like ours look as real as possible, the main point that you have to remember is to sell the punch so that it doesn't look cheesy and bad. This consists of a few things, 

Firstly: To be on Target and out of distance. For example when our villain is going to throw a punch at the victims head or body, The actor has to be at far enough distance where the punch will not fully connected but the punch has also got to be on target with where you are looking to punch. 

The prime distance that you want to be from each other is where your knuckles will be touching each others. Around the 2 characters you are going to want to imagine a semicircle connecting both actors so even when moving around you will be at the same distance. 

When going to throw the it should be like "arm on a shelf, reaching out then across" this may look silly but from a certain camera angle will look affective on film, for example behind the shoulder shot would look real with the reaction of the victim.
THERE IS NO REASON TO BE HIT!!!
Unless it's a body shot as you need something to react too.


With filming a body punch it is a lot different as you are going to be making contact with the other actor in our case the victim. To do this you are going to punch with a loose fist, and slap your hand on their belly but make sure its a good enough hit so they can feel and react to it. From the victim's
 point of view you want your legs to drop a bit as your legs normally go out from under you when being punched in the belly. Remember to also shake your head along with it. 

ALWAYS MAINTAIN EYE CONTACT whilst on camera, if you don't maintain that eye contact with each other, while your on camera in a fight scene you will see your partner's brain shut off when they forget the routine then which resolve in a actor getting hit. So with our sequence we have to make sure as it is very one sided the victim knows exactly how he is being hit and how to react, because as off right now i don't know if the camera will fully see the victims face within the shot which may help so the actor can watch how he is being punched and be fully aware.

One part of making a fight sequence look more real and helps the editors job to make it look really believable to the audience is to VOCALISE! for example making groans, moans and sound that act like you are throwing punches. Now i have gone through this i now need how to do this with a camera involved.

A good way to help when filming with a camera in a fight scene is you want to imagine there is plane flying out and going straight directly to the receivers end face. A good way to remember this is by "breaking the Plane" if you throw the punch on the left side from this angle you will clearly see that the punches are not going to connect. But if you throw from the right side all the way throw to left it will look as if to the camera that the punch has connected. So our actors must be aware of our camera positions at all times so the actors can adjust. 

Now if you are filming from behind the victim like we will do you want to make sure that the puncher steps out to find the camera and then go through with the punch through. If the camera can't see the punch its a waste of time.
 
even at low angles always play your punches to the camera. As it translates well to the screen as we will use a lot of low angle shots in our sequence. The actor who is most at risk of being hurt in the scene tends to be the one who is in control which in our scene will be the villain. 

When filming a choking scene which we will be using for our opening you want to make sure who is in control of what while performing this, the person choking will want to be pulling away while the victim will be pushing the hands away in the opposite way so no one can be injured.


When using props we use a pair of knuckle dusters which luckily won't have to be used when the punching is going on unless it looks bad. i also think the use of sugar bottles might be cool as they shatter so easily and are harmless.

As the beating goes on the tension needs to build until it looks like the victim is actually about to die in the film. with doing all of this WE NEED TO MAKE SURE THAT WE TAKE ALL THE SAFETY MEASURES REQUIRED FOR THE SCENE. 


Independent Research 1 (how to light up dark locations)


Using this video, It will help me to find ways to help light the location in which we will want to film with my group, which predominantly in quite a dark shipping container. and will provide a more interesting set to pull in the audience rather than be boring.


One important part to note which we get told in the video is WHITE and BLAND WALLS SUCK it has a lack of visual interest for the audience.  a good tip would be to cover up the blank spaces as much as possible to make it very dynamic and flavourful.

How this could apply to our opening instead of having a stereotypical white shipping container, we could fill it with graffiti and to add onto that put a quote over the graffiti for example "Snitches get stitches". 

Make sure to use film lights: without using specified film lights, normal lights that are around have the potential to strobe on camera and look really poor, and you won't be able to control the intensity of them. Good contrasting colours that are regularly used in films are orange and blue. also make sure that the lights are balanced with each other
.

With our opening sequence we are using lights known as () and they are film lights that we will place around the shipping container to give off a nice turquoise green colour, and i feel like we should incorporate orange into it maybe from behind the camera as if its coming in from the outside.

Try to avoid overhead lighting as it can cause shadows to appear which may darken your scene and yourself as the actor in the scene, lucky our open won't feature any lighting overhead as of now but this could well change, but we could also have this problem if the lights are below for example it may light up the bottom but not the top. 

How to use Neon lights for filming


Now this video which i have used to help me fro my opening focuses on more the lights we will be using throughout this opening which are neon styled green lights as it's not your normal colour to use but lots off people like the aesthetics of neon lights in films. Personally for me like it is suggested in the video that i want the colours to sort of a character in the film and they have a huge role to play within.

The most important thing about using neon lights within your opening is choosing the colour palette, it's better to have 2 colours that contrast with one another rather than one so that you have have one to fall back onto so you can have that separation and so it doesn't all look one level. You may also want to use some practical lamps to help light your scene to make it looks brighter.

I can use this to apply to ours by choosing 2 colours that work well with the film at the moment we really like the colour green as its quite unique, to contrast with this we may try to add a tint of orange to try and divide the shot up. 


My Final Sequence

  Here is an attachment of my final opening sequence.